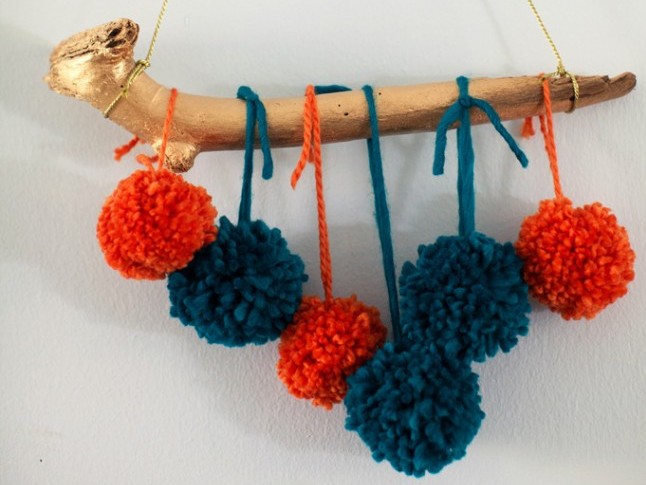
I love making cute things for my friends when they have babies to give in addition to a shower gift. Today’s DIY was one creation that started out as a baby mobile, turned into a wall hanging, and ended up hanging in my own home (and not in a baby’s room), and it would work for any and all of those uses. It is cute enough for a nursery or toddler room, but cool enough for your living room as well. And it basically uses stuff that a crafty person would already have at home.
Supplies
- yarn in your selected colors
- a pom maker
- a piece of driftwood or a large stick
- gold spray paint (or any color you prefer)
- small sewing scissors
- a cord or sturdy string for hanging the mobile
Instructions
First you have to make your pom poms. That’s a DIY in itself and can be a little tricky if you’ve never done it before. To help you visually, I did a step-by-step tutorial for making the pom poms using a pom maker.

Step 1: Wrap yarn around one side of the pom maker like in the first photo. Once you have it covered in yarn as shown, wrap the other side the same way.
Step 2: Close the pom maker and cut a piece of yarn about 6 inches long to wrap around the length of the pom maker.

Step 3: Insert your scissors at the end where the pom maker comes together and cut the yarn through the center along the length of the pom maker.
Step 4: Tie the 6 inch piece of yarn tightly around the center of the pom maker, where you just cut the yarn.

Step 5: After tying the yarn tightly around the center of the pom maker, pull the pieces of the pom maker apart, leaving you with one completed pom pom.
Next page: Making the pom mobile


