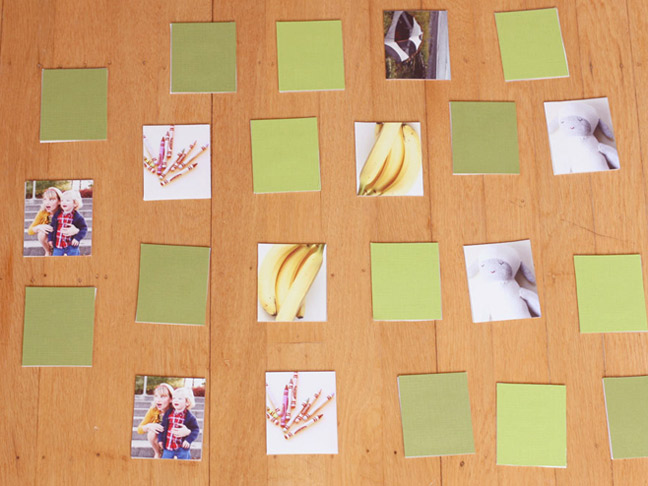
What makes this unique, is that the images are photos you’ve picked out specifically for your child: mom and dad, a favorite comfort object, a familiar park, best friend next door, or favorite food. They’ll love recognizing these familiar objects while learning to identify pairs and reinforce their growing vocabulary. This project costs about $5 to $10 to make.
")
Supplies needed:
Cutting mat
Cardstock in one color
20 photos total: 10 different photos with doubles
X-acto knife
Spray adhesive
Pen
20 sturdy cardboard or wood pieces. Mine were 3” x 2.5” from the scrapbook aisle at my local craft store, but anything similar in will work just fine.
Preparation: I took a few photos of objects my son was familiar with around the house. Along with a few other photos of family, friends and places I had on hand, I ordered doubles prints from my favorite online source. These 20 photos cost me around $4. Keep in mind when you are selecting photos that you’ll be cutting out a small square from the photo. Some photos may not work to capture the main image. For example, an up close photo of your family pet may be difficult to crop out the main image.
")
On top of a cutting mat, lay the cardboard square on top of each photo to frame the main image.Trace around the cardboard and cut the photo with the x-acto knife.
")
Do the same thing with the cardstock. Trace and cut out 20 pieces.
")
Your photos, cardstock and cardboard pieces should all the same size.
")
Spray one side of the cardboard with the adhesive. You may want to lay down paper towels before to avoid getting glue on your mat.
")
Carefully apply the photo to the sprayed side. Do the same with all the photos and cardboard pieces. Let them dry for a few minutes.
Then spay and stick the card stock as well to the other side of each of the cardboard pieces. There is even adhesive card stock available which would make this part easier.
")
After you let the pieces dry for a bit, you’re ready to play. Lay them all with with photos facing down and show your child how to pick them up one at a time, trying to find matches. They’ll love the familiar objects, people and places as they learn to identify pairs.
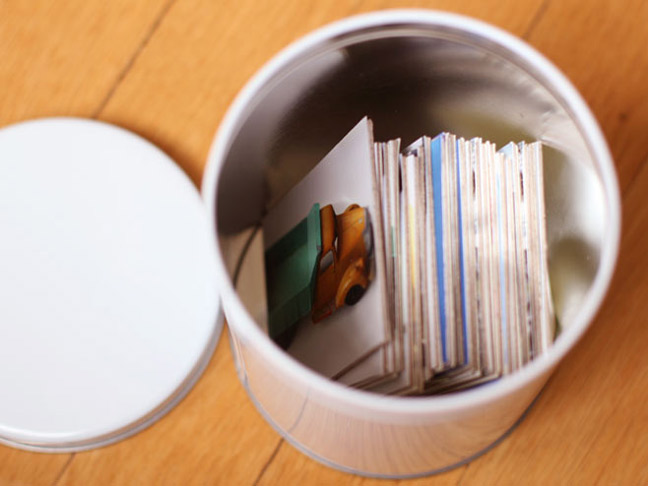
Find a tin or small box to store them in. I bought this white one at a craft store for about $2.


