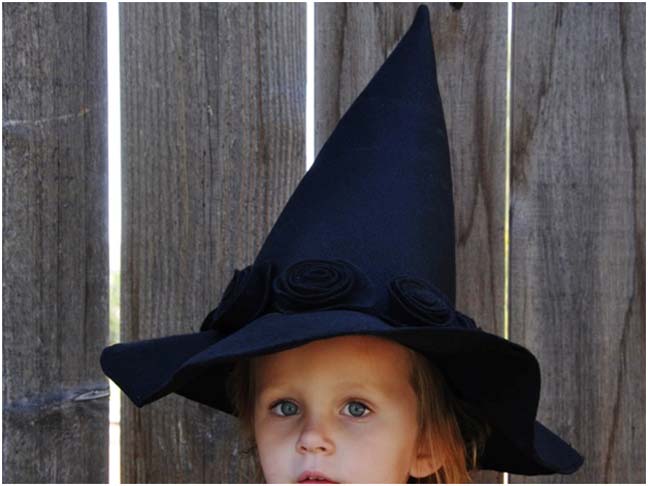
If you’re obsessed with Wicked the musical like I am, this DIY Halloween witch hat tutorial is right up your alley. In Wicked, Elphaba (EL~fa~buh) was the real name of the Wicked Witch of the West. I used her as the inspiration for this Witch Hat to reflect her softer, misunderstood side. Get this witch hat pattern free here—it will fit any child from ages 3 to 8.
Supplies:
- 1/2 yard black felt
- Free Witch Hat Pattern
- hot glue gun
- scissors
- sewing machine
- pins

Instructions:
Step 1: Begin by printing the pattern and tape together at the marked points.

Step 2: Using your scissors, cut out the pattern.

Step 3: Use the pattern pieces as a guide: trace the pattern pieces onto the felt and cut out the felt pieces so you have two brim pieces nad a cone piece, as shown below:

Step 4: Sew the cone piece down the side with a 1/4-inch seam.

Step 5: Sew the two brim pieces together, around the entire outer edge using a 1/8-inch seam.

Step 6: Place the brim and the cone together and secure with pins.

Step 7: Sew around the entire opening of the hat with a 1/4-inch seam.
Step 8: When you cut out your brims on the fold, you were left with a nice circle. We’re going to use those circles to make florets for the hat.

Step 9: Begin making the florets byby cutting around the outer edge in a spiral pattern from the outside of the circle working toward the inside.

Step 10: Swirl the patern around with your scissors until you reach the middle.

Step 11: Once you finish cutting, starting with the outer cut edge, roll the felt with your fingers. Continue rolling, keeping the bottom flat so have a short, wide cylinder. Once you get to the end, place some hot glue on the bottom of the cylinder. Press the small flap onto the glued bottom and secure shut

Step 12: Make nine florets. You will need to use one of the original circles as a pattern to cut out 7 more florets.

Step 13: Place a generous amount of glue on the bottom of each florette and glue each floret to the base of the hat, covering the seam.

Happy Halloween!

Want more Halloween Costume ideas?