Blanket binding comes in a great array of colors, so it’s sure to match any decor. Let’s get started:
MATERIALS

- Cardboard Letter
- 1 package Satin Blanket Binding
- Glue Gun
- Mod Podge (Not pictured)
- Sewing Machine and supplies
INSTRUCTIONS

Take the blanket binding out of the package and completely unroll it from the stabilizing cardboard

Using your sewing machine, ruffle the entire length of the binding, except for the last 18″ or so.

With your iron on low setting, iron the last 18″to get out the wrinkles and creases.

Use these smooth pieces to cover the bottoms of the letter. Study the letter and figure where you won’t be covering the letter with ruffle, it will need smooth fabric. Mine needed it on the bottom, bottom of the T and top of the T.

Cut you ruffle pieces to size by wrapping it around the front and sides of the letter. Starting at the bottom of the letter, apply a generous amount of glue and add a layer of ruffles.

Here are a few started. Just add layers on top of each other so your gather stitches don’t show underneath

When you get to a new point, just cut the ruffles to size again, keeping the ruffles wrapped around the edges. Finish the top off by overlapping the edge just a bit. Your ruffle stitches will show at the top row.

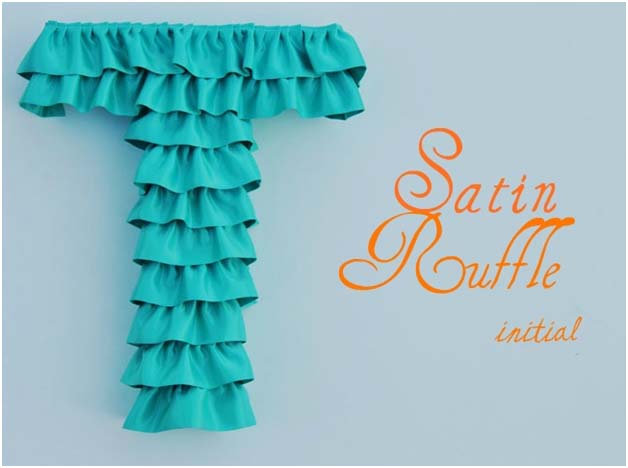
You’re done! I don’t know what girl wouldn’t love this hanging in their room!