My baby boy has entered the age where he thinks throwing his toys on the ground is hilarious. So instead of going crazy picking them up off of the floor every time he launches one, I’ve started clipping them onto his clothes. It feels like all of the toy clips that they sell these days are made for girls, so I decided to make some of my own manly versions.
These can be made with just a few lengths of paracord and a suspenders clip. With this DIY paracord baby toy, in no time your baby’s toys will be staying put.

Supplies:
- Paracord in various colors
- Scissors
- Suspender clips
- Wood burning tool or lighter

Instructions:
Step 1: Start by cutting a length of paracord. If you are using one color, you need about twelve feet of cord. If you are using two colors, about six feet of each color. Use a lighter or a wood burning tool to burn and seal the ends of the rope to keep them from fraying while you work.

Step 2: If you want to use two colors, you will need to splice the two lengths of cord together. Do so by cutting away some of the interior of one end of the rope, and inserting the end of the other length of rope into the empty space. Seal the connection by melting the ropes together or sewing them shut. This connection will be hidden by the knots, so don’t worry if it isn’t perfect.
Step 3: String your paracord through the suspender clip to form a loop that is twelve inches long. Any longer and your toy clip could become a choking hazard for baby, so keep it under twelve inches.

Step 4: Arrange your strings under your suspender clip so that the loop is in the middle and the loose ends are on the outside.

Step 5: Take the loose end on the left and wrap it across the front.

Step 6: Take the loose end on the right and wrap it over, under, and through.

Step 7: Pull that knot tight and repeat on the opposite side. If you are using two colors, always start the knot with the same color rope to form the correct pattern.

Step 8: Continue braiding, pulling the knots tight as you go.

Step 9: Keep the braid going until you end up with a small loop at the end of your toy clip.

Step 10: Trim the extra rope close to the final knot and seal it with heat. A wood burning tool works best here because you can make a really clean seal.


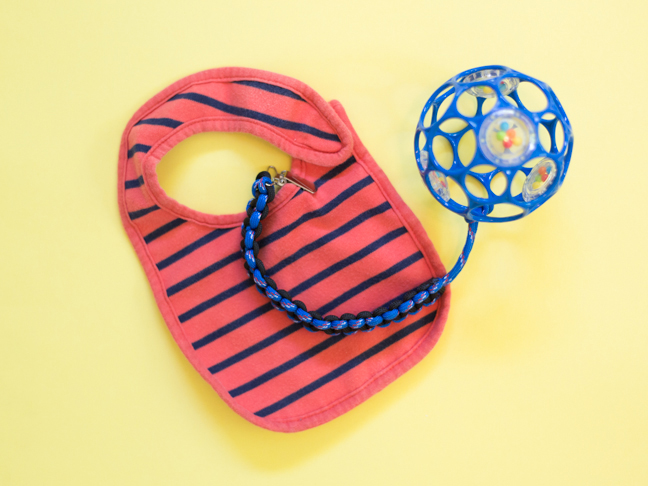
Step 11: Repeat the process on both sides and then your toy clip is complete! Strap it onto a toy or pacifier by looping the suspender clip around your toy and through the loop on the end. No more escaped toys!


More Baby Toys: