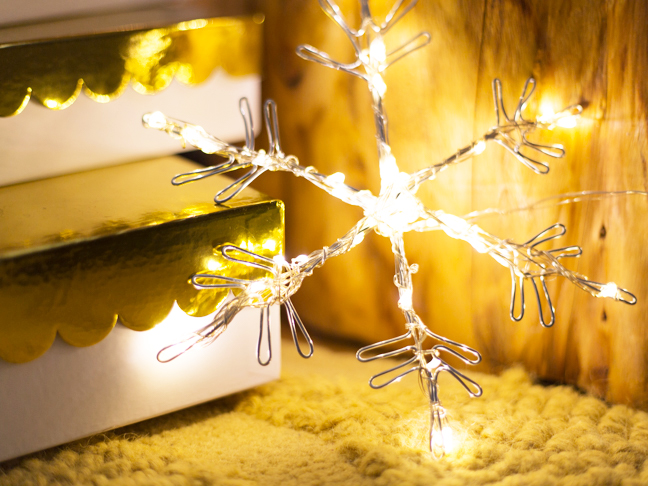

I hate the part about the holidays where you have to take down all the decorations, don’t you? I always leave mine up as long as reasonably possible. And then I always, always miss the lights! So this year I made some snowflake lights nspired by Pottery Barn so that I can justify leaving some lights up for just a little while longer. Because snowflakes don’t have to just mean Christmas, right? I think they’re fair game for the whole winter. These little snowflake lights come together quickly, and you can sprinkle them all over the house for a little extra twinkle.

Supplies:
- 16-gauge aluminum wire
- wired fairy lights
- scissors
- jewelry pliers
Instructions:

Step 1: Carefully unravel your wire, being sure not to add any extra kinks to it. Try to keep it in as smooth a line as possible.

Step 2: Begin bending your snowflake. You can create any shape you like; I found that snowflakes with six points work the best.

Step 3: Continue bending your snowflake until you have a general outline. Cut the end of your wire and wrap it around the center of the snowflake a few times to secure it together.

Step 4: Mold and shape your snowflake to refine its appearance. Now is when you can use the pliers to make fine adjustments and really get the wire to bend in the way you want it.
Step 5: Take your lights and begin wrapping them around the snowflake tightly. Wrap around all the points until the snowflake is as bright as you’d like it.

Step 6: Hang your snowflake somewhere fun! You can hang it on a small nail, place it on your mantel, or put it anywhere you’d like to add some glow.

More DIY Holiday Decorations:


