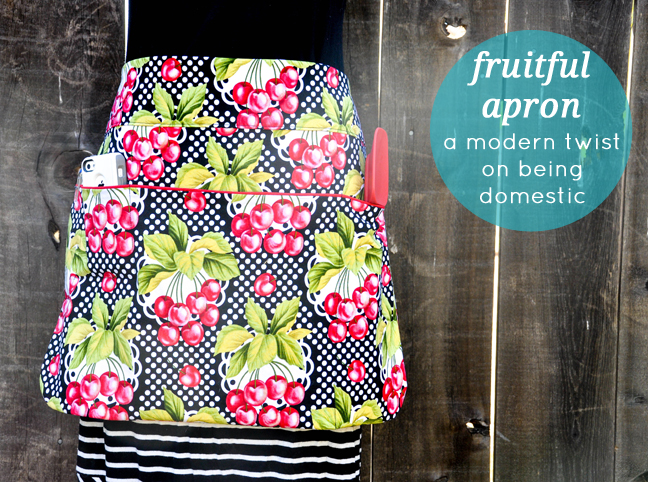
Today’s mom usually isn’t stirring pots over the stove for fours hours every day. She helps the kids with homework, responds to emails, checks Pinterest for a quick dinner recipe, and cuts up construction paper for a toddler craft—all at the same time. Misplacing the tools that help you get your jobs done can be the most frustrating! Strap on this apron—no ties, just Velcro—and keep your sanity during that late afternoon rush. Here’s how to make your own fruit-patterned apron from this easy apron pattern.
Supplies:
- 1 yard cotton fabric
- 1 yard pre-made piping
- 6 inches Velcro
- FREE PATTERN Cut out pieces from fabric (2 main, 2 pockets, 1 strap)
Instructions:

Step 1: Take one of the pocket pieces and pin the piping to the top of the 20.5″ side. Sew the piping to the pocket.

Step 2: Lay the other pocket piece and place it RST (right side together) on the piece with the piping sewn on it and sew those two pieces together. Use the stitch line that was used on the previous step for easy alignment. Turn the pocket right side out and press. The piping should be exposed at the top of the pocket.

Step 3: Take one main piece and lay it right side up. Place the finished pocket (shown folded back for placement demo) next, making sure the bottom raw edges line up. Take the other main piece and place it RST on top. Again, all the raw edges on the bottom and sides should line up.

Step 4: Take a small place or candle to use as a guide to round the bottom corners. Use a pencil to trace the shape and trim.

Step 5: Pin around the sides and bottom of the apron and sew using a 1/4″ seam. DO NOT SEW THE TOP.

Step 6: Turn the apron right side out and press.

Step 7: Stitch several compartments to your liking. Measure your phone and add at least an inch on each side to accommodate. Stitch the bottom of the compartment a little less than the size so it will be able to stick out above the pocket, for easy access. I made additional compartments for scissors, pens, and spoons.

Step 8: Take your 2 strap pieces and lay them RST. Begin stitching 10.5″ from one side and sew all the way around the sides and top and back to the bottom, in 10.5″ as demonstrated above. Turn the strap right side out and press well. Make sure to press the unsewn gap seam allowances in toward the wrong side to create a crisp edge.

Step 9: Slide the apron up into the unsewn section of the strap.

Step 10: Sew a topstitch to secure the strap in place.

Step 11: Cut the Velcro into two 3″ pieces and separate so the hook pieces are on one side of the strap and the catch pieces are on the other strap. Adjust as needed and sew the Velcro into place.

Now, you are ready for the onslaught of kids and duties!
More DIY Sewing Tutorials:


