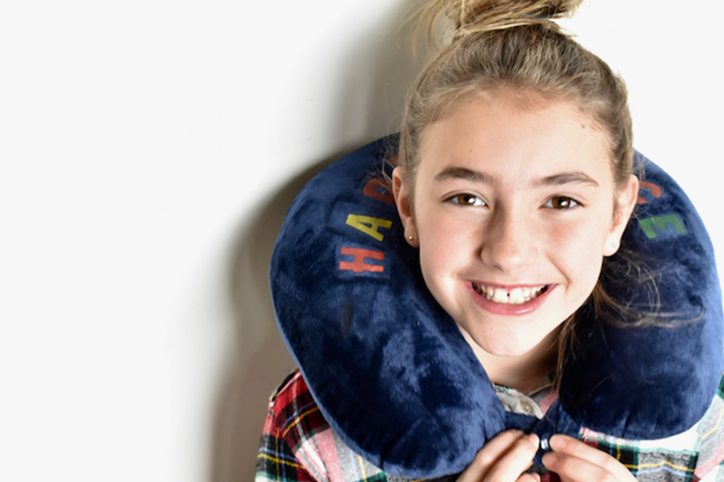
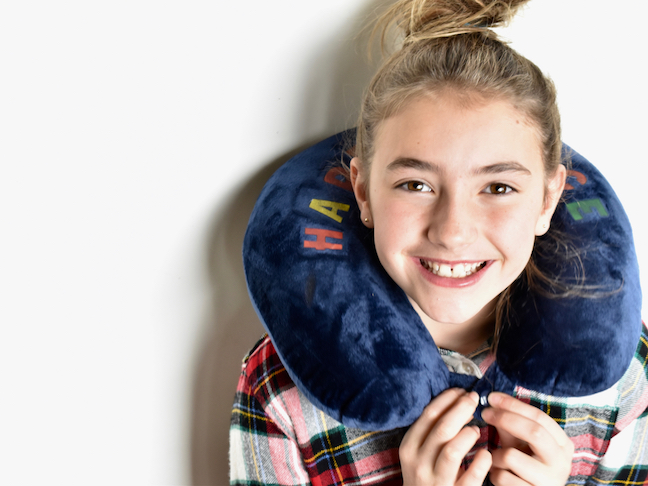

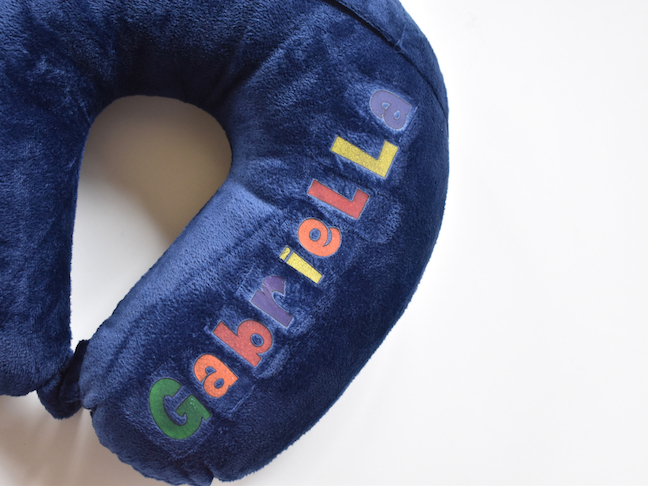
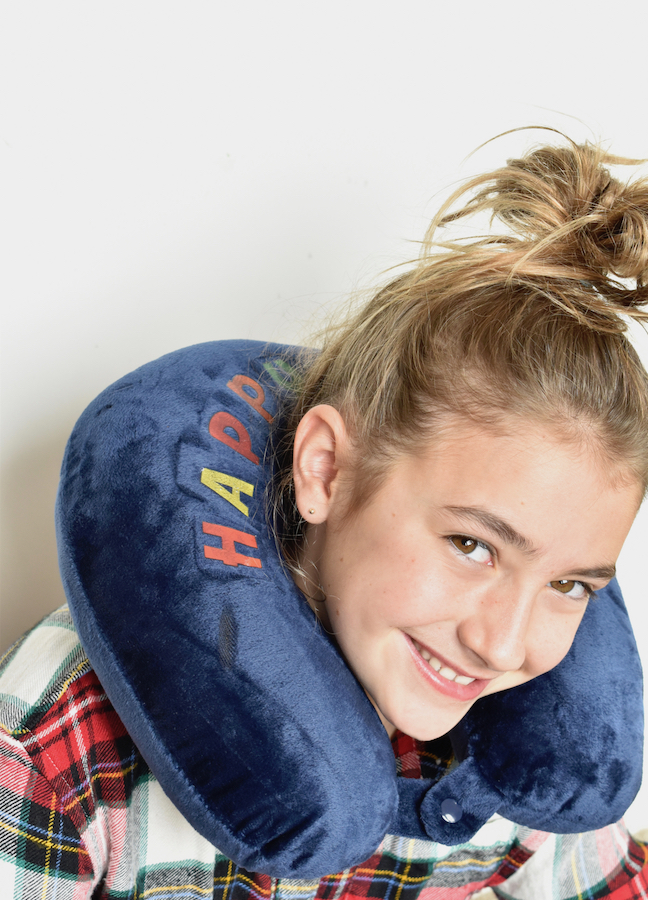
When my family travels, an in-flight necessity and road trip must-have is a travel pillow. There’s nothing worse than a head bob, and aching neck after dozing off on a long flight or road trip. Sleeping upright is not comfortable no matter what we seem to do, but a travel pillow around our neck helps. For this year’s travel adventures, I surprised my daughter with a DIY custom travel pillow. When she saw her name on a pillow, she squealed with joy. It’s the little things, right?
I didn’t need to sew or stuff polyester inside the pillow; instead, it’s semi-handmade. I bought the pillow, and then made an easy, custom upgrade with iron-on letters.
Set aside 30 minutes and let’s get started.
DIY Customized Travel Pillow For Kids
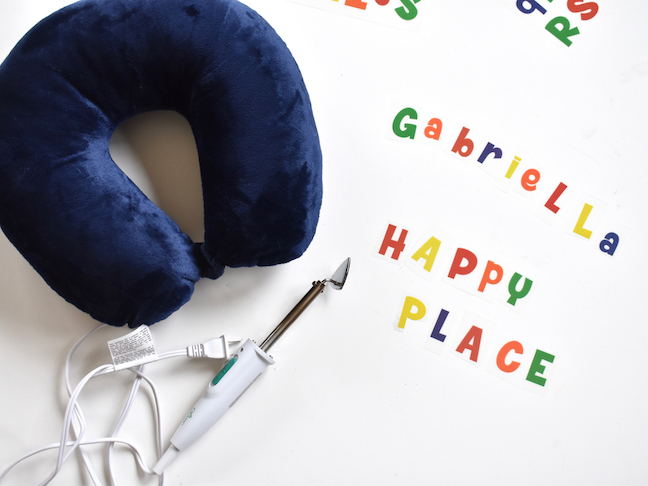
Materials:
- Travel pillow, Walmart for $10
- Iron-on letters
- Mini Iron
- Scissors
Directions:
Step 1: Cut the letters out into small squares.
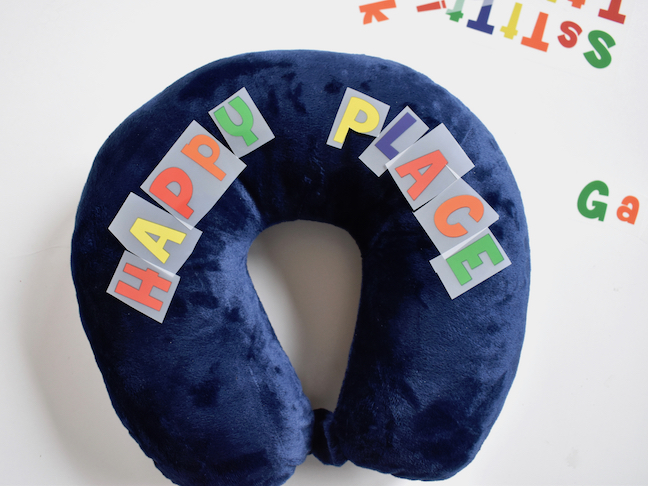
Step 2: Lay the letters on the pillow to know placement and spacing.
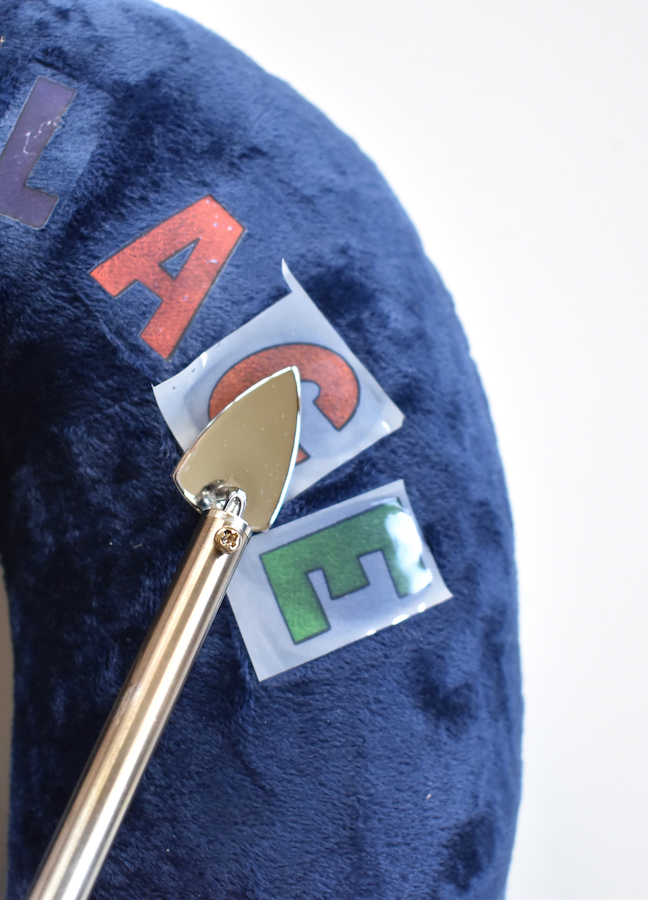

Step 3: It’s time to iron them on! The directions on the package recommend using a cotton cloth in between the letter and the iron. I tried that, and it wasn’t hot enough. So, if you are having issues like me, ditch the cotton cloth. Turn the mini iron on high. You can start with it on low depending on the fabric you’re working with. My fabric was somewhat fuzzy and thick, which required higher heat. Press the iron on to the letter (plastic side up, so the letter is not mirrored), for about 35-45 seconds. Be sure to press the heat along the edges. Let it cool a bit, and begin to slowly peel. If it lifts easily, slowly continue to pull the plastic off the letter. If it’s not peeling clean (the letter is still on the plastic), apply more heat in that area and try again.

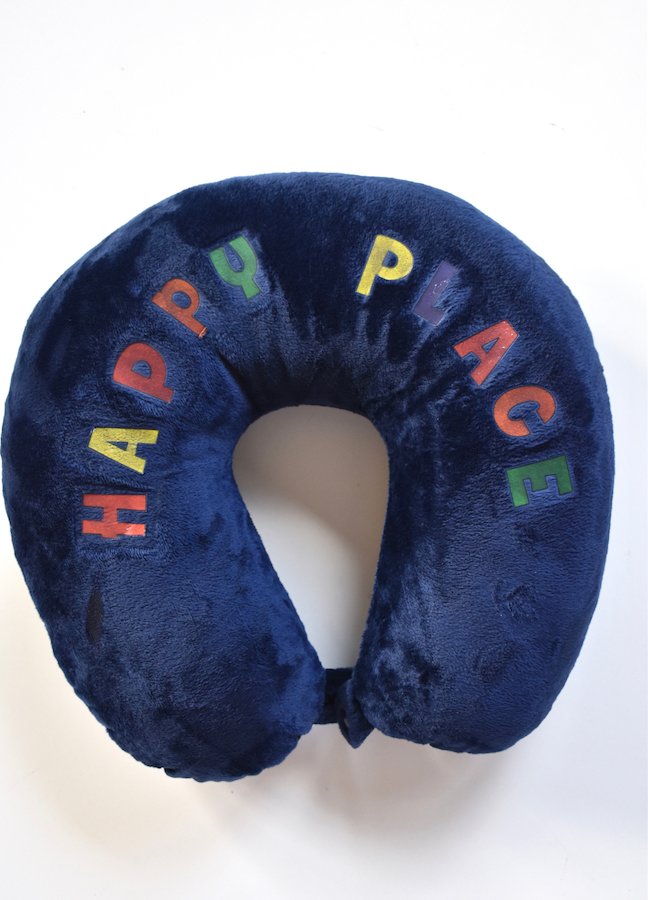
We hope you have safe travels ahead, and sweet dreams along the way!