
I love jewelry. It’s a great way to accessorize any outfit – whether I spend the day around town with the kids, or a night out with my hubby. I’ve made my own jewelry before with hardware and nail polish, but I’m always inclined to add more unique pieces to my DIY jewelry collection. I don’t have fancy equipment, and I’m on a limited budget, but I found a resourceful material in my kids art cart – polymer clay. My DIY clay necklace turned out beautiful! If I didn’t know I made it from clay in less than 30 minutes, I would assume it was store-bought.
Not only is clay affordable, but also it’s versatile with so many color and shape options. Right now, terrazzo is trending, geometric shapes are still hot, and that marbled look hasn’t faded yet. So, the options are endless. Get out that clay and rolling pin. We have some jewelry to make! Details below.
DIY Geometric Clay Necklace
Materials:
- Sculpey clay
- X-acto knife (or knife that comes with Sculpey kit)
- Oven and cookie sheet
- Parchment Paper
- Pendant Bail
- Gold Chain
- Small circle cookie cutter (lid, metal teaspoon, something small and round, etc)
- Gorilla Glue Super Glue
Directions:

Step 1: Decide on a base color, which will be the largest amount of clay. In my case, the color was white. Next find two additional colors that will be secondary to the base color. I liked a black and blue combo and black and blush combo for the secondary colors. These secondary colors will require less clay, so the pieces should be smaller. Next, roll them into “snakes.”


Step 2: Bunch the “snakes” together and twist them. Then, fold it, and stretch it. The colors should blend nicely. Don’t blend too much, or it can all become grey.


Step 3: With a rolling pin, roll the clay out. ¼ inch thick is ideal.


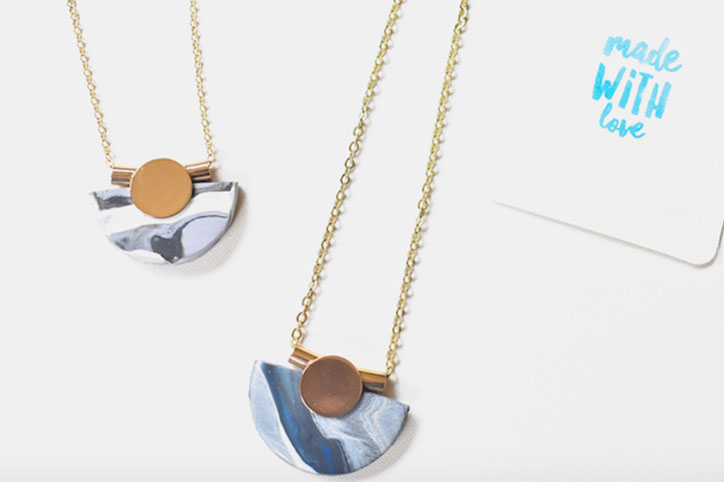
Step 4: Use a small circle top to cut out small shapes. My favorite shape to go along with my pendant bail was a circle, and a half moon shape. . I found the best size and shape for a circle was from a small top. And for the half moon, I used the X-acto knife to cut a straight-edge, and then used a metal teaspoon to punch out the shape. Clean up any of the shapes if need be, and then put in the oven on a baking sheet with parchment paper. Follow instructions on the packaging for baking. I had to bake it at 275 degrees for 15 minutes.


Step 5: Once the clay is cool, it’s time for the final steps. Add a drop of super glue to the back of the pendant bail and then gently press onto the clay shape. Don’t use too much glue because it will show on the front of the necklace. It should “glue” after one minute, but leave it at least an hour for full adhesion.


Step 6: Now it’s time to add it to a gold chain. If you have one in your jewelry box, you can use it, or use a store-bought gold chain.