Bean bags are expensive, so I decided to make one for my daughter to enjoy while she’s reading her favorite books and watching TV. Here’s the problem though: Mama doesn’t sew. My Internet research came back with nothing in the no-sew bean bag chair arena, so I came up with a concept of my own. Inspired by a DIY wedge design I found on some blogs and Pinterest boards, I created a cozy chair for the non-sewing set.
Want to make your own DIY no-sew bean bag chair for your own kid’s room? Follow my instructions below.


Supplies:
- Three yards of fleece fabric (1-1/2 yards of each if doing two-tone like I did)
- Poly filler like this one. I used four 12-oz bags (Do not use bean bag beans! They’ll slip out.)
- Scissors
- Measuring tape
Instructions:

Step 1: Cut one-inch slits all along the edge of your fabric, holding both pieces together so the cutting matches up. For this project, make them about 2 -3/4 inches into the fabric. Working from one end to the other, tie the lined up pieces of fabric to each other and double-knot (see photo below).

Step 2: Cut your fabric into two separate pieces measuring 51×38″ and lay them on your workspace facing inward toward each other. Faux-sew along the two long sides, keeping the ends of the tied pieces inward. If you check the right side of the fabric, you’ll see a seam forming.

Step 3: Keeping your fabric inside out now that the long sides are “sewn” in place, fold it in half horizontally. With both sides lined up against each other as best you can, cut a rounded corner down from the top toward the center. When you open the fabric, you should have one round end. Faux-sew it closed.

Step 4: You should now have what loosely resembles a giant pillowcase. Spread it open and place it on your workspace again, this time so that your seams are in the center (shown below). On the remaining open end, faux-sew in from each edge leaving an opening in the middle big enough to stuff (mine was about 8 inches).
Step 5: Turn your chair right-side-out and create its shape with stuffing. One piece of fabric should be the base while the other is pulled up to a corner, creating a large wedge. Stuff to your desired feel — less for a softer chair, more for added structure.
Step 6: Tie the center knot together first to secure your work and then finish by closing the stuffing hole with more faux-sewing. This time your ends will show as opposed to on the rest of the chair where they are turned inward. Later, if your chair gets too much love and needs re-fluffing, you can gently untie this back piece to add more stuffing.

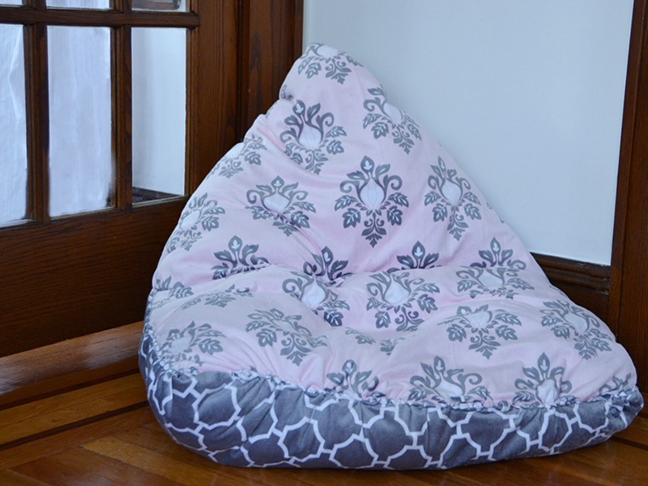
Enjoy! My kid sure did.
Like what you see? Don’t forget to Pin it!