
My 2-year-old is a sucker for anything frilly, fluffy, or featuring a big skirt. I’m all for playing dress-up with stuff that she already has, or splurging on the occasional store-bought costume, but there’s no way I’m spending tons of money to have a huge fantasy closetful of outfits for her. So I got a little creative. Through some research and a little trial and error, I’ve created the easiest-ever no-sew tutu. There’s no glue or sewing required and very few materials involved, so the mom anxiety threshold is super low with this easy DIY tutu craft.

Supplies:
- Tulle (six-inch-wide roll)
- Ribbon (1/2-inch-wide, if grosgrain; up to 1-inch-wide, if satin or organza)
- Scissors
- Tape Measure
Instructions:
Step 1: Measure your child’s waist with a tape measure, adding an inch for comfort. Before cutting the ribbon, hold your finger at the waist marker and then add an extra 20 to 24 inches. This added length will be for the ends that you use to tie the tutu on her, in a bow at the back of her waist. If you have a thicker ribbon, you want plenty of slack on each side.

Step 2: Cut your tulle into strips. My daughter’s tutu is cut to a 20-inch waist and I used 62 strips around a 1/4-inch satin ribbon. For very little girls like mine, 12 to 14 inches creates a nice short tutu. On older girls, you’ll want to do closer to 18 or 20 inches. If you prefer a long-skirted tutu, add length accordingly. The length of your strips will be about half the length of the skirt, so use that as a guide in choosing how to cut your strips. I don’t like my tutus to look too uniform, so I try to vary the strips within a 2- or 3-inch range for some volume in the skirt.
Step 3: Make a knot on either end of the ribbon where your tulle will stop and the waist tie begins. Depending on how much room you left, this should be between 10 to 12 inches in on either side. The knots will hold your tulle in place and keep it from sliding off.
Step 4: Let your child help you arrange the tulle pieces in order. Mine likes to haphazardly hand me pieces, which totally works for a 2-year-old! Older kids will probably have an opinion about how they want to pattern their colors. This is a nice teaching moment to practice colors and counting with preschool aged kids.

Step 5: Starting at one end, fold your tulle in half and place it above the ribbon with a half-loop falling below the ribbon (see above). Holding that bottom loop in place with one hand, bring the two ends together at the top. Take the ends around, behind the ribbon, pulling them through the bottom loop of tulle. Tighten into a knot. Repeat with each piece of tulle until your tutu is complete.

Step 6: (Optional) If you used a thicker ribbon or one that will fray easily (like organza), finish off your ends with a thin coat of clear nail polish, allowing it to dry for a few hours before play.

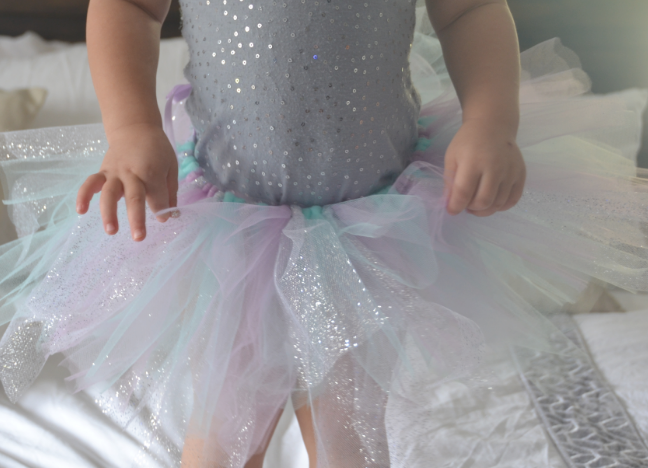
Your final product should look like the above.


