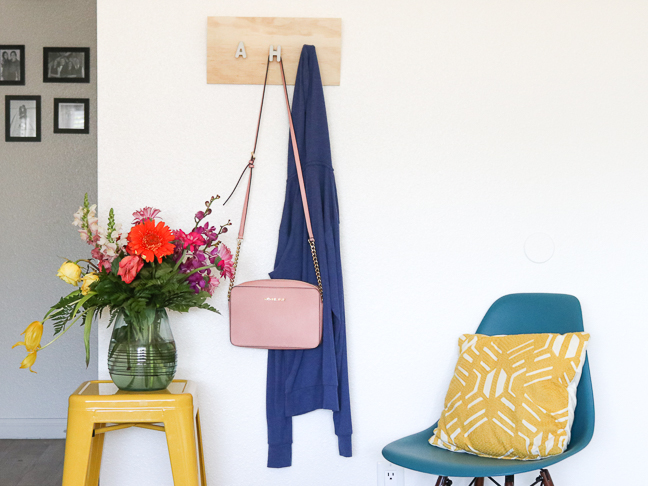
My solution for a clutter-filled entryway: These cement alphabet wall hooks. They’re adorable and they help minimize the junk that piles up just inside the doorway. Give everyone in the family their own hook and viola! No mess to trip over…or hours looking for backpacks in the morning (hey, a mom can dream!).
Bonus: Cement is super easy to work with (no measuring required) and you can even paint the hooks different colors to match your decor.
Ready to cut the clutter? Here’s how to make these cement alphabet wall hooks.


Supplies:
- standard powdered cement (available in small quantities at craft stores)
- silicone alphabet molds (about 2-inch letters)
- plastic disposable cup or bowl
- 15-inch piece of wood (pre-cut plywood is available at craft stores)
- flat 2-inch screws
- power drill and drill bit
- e6000 glue or equivalent
- measuring tape
- 2 sawtooth picture hangers with small nails
- hammer
Instructions:
Step 1: Scoop powdered cement into the disposable cup and add water, stirring until it is a thin pouring consistency. Pour into the desired letter molds. Set aside to dry for 15 minutes.
Step 2: After about 15 minutes, check the cement. Insert a screw into each letter (for best results, it should be the same location in all letters, i.e. the middle or top, to ensure they’ll be even when complete). Set aside for another 15 minutes, then remove the screws. If the cement dries completely with the screws inside, you may not be able to remove them.

Step 3: While the cement dries, measure the middle of the piece of wood and mark with a pencil. Then measure equal distances apart and mark where each hook will go.

Step 4: Drill holes at each mark and screw in each screw from the backside using the drill or a screwdriver.
Step 5: Carefully remove the dry cement letters from the mold. Add a small amount of E6000 glue or heavy superglue to the end of each screw and twist each cement letter onto the screws until secure. Let dry completely.

Step 6: Turn the piece of wood over and place two sawtooth picture hangers equal distances apart at the top (this is how it will hang). Carefully hammer the small nails in place to secure the picture hangers.
Step 7: To hang, measure the distance between the sawtooth picture hangers on a wall and hammer long nails into each location.
Step 8: Hang the picture hangers on the nails and drape purses or jackets on the hooks to begin organizing.
These are great personalized pieces of DIY decor for your home and they will keep everyone organized with a designated hook to hang their jackets and other items!