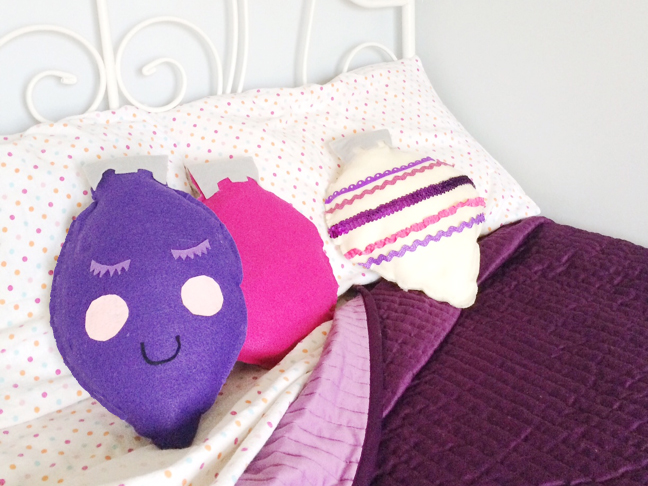

I don’t know why, but the kids are really into decorating for the holidays this year. They’ve made it very clear that a simple ol’ tree just won’t do. So, I’ve taken the cute and fun decorations to a whole new level. These DIY Christmas ornament pillows are the most adorable additions to their rooms, and there are a million variations.


Look at that little ornament taking a snooze. You’d have to have a heart made out of coal not to want to snuggle up to that softie.
Supplies:
- this printable ornament template
- ¼ yd felt for each ornament
- 8.5″ x 11″ sheet of gray felt for ornament topper
- 8.5″ x 11″ sheet of black felt for ornament smile (optional)
- 8.5″ x 11″ sheet of pink felt for ornament cheeks (optional)
- assorted ribbon and trim for decoration (optional)
- scissors
- transparent tape
- fine-tip marker
- pillow stuffing
- hot glue gun and glue sticks
Instructions:
Step 1: Print the ornament template. Using scissors, cut out each shape. Align the top and bottom of each ornament, and tape them together to create one large shape.
Step 2: Using a fine-tip marker, trace each shape onto the felt. Cut out each shape twice to create the front and back of each pillow. Cut the topper off of one ornament, and trace it twice for each pillow. Apply a thin line of hot glue to the edge of one shape, leaving a hole large enough to fit your hand. Align the matching shape, and press the two together to create your pillow. Glue the gray ornament topper piece onto the front and back of each pillow. Repeat for each ornament.
Step 3: Fill your pillow with stuffing. Carefully push stuffing all the way around the interior perimeter or your ornament so that the shape will be full and properly shaped. Continue to fill the ornament, and seal the hole by applying a thin line of hot glue and pressing the two sides together.
Step 4: Using decorative ribbon, trim, or sequin strands, create striped pillows. To create a face for your pillow, cut a thin U-shaped smile from the black felt and two 1.5″ circles from the pink felt for the cheeks. To create eyelashes for a sleeping ornament, cut two 2″ strips with zigzags on one side. Slightly curve the strip onto the pillow face before adhering with glue.
Photos by Shauna Younge of Sweet Tooth for Momtastic
More Holiday Decor for Kids: