 I love a new year with a fresh start, don’t you? I always have an itch to get myself organized—the planners come out, the drawers get cleaned, and I make way for the new year. Lately, the front of our refrigerator has gotten a bit cluttered. We still have cards and papers from over a year ago, proudly displayed right out there! So I dreamed up a quick and simple way to declutter the refrigerator door, and add a bit of organization while I was at it. Chances are you have most of the materials for this little DIY refrigerator magnet organizers project already, so let’s get going!

Supplies:
- plain clothespins
- craft paint
- paintbrushes
- small, strong magnets
- strong glue
- alphabet stickers
- Mod Podge
Instructions:
Step 1: Paint the front side of the clothespins with craft paint, being careful to create clean edges. Set the painted pins aside and let them dry thoroughly.

Step 2: Once the paint is completely dry, turn the clothespins over. Glue a small magnet to the back of each clothespin, in the center of the bottom section. Allow the glue to cure completely.

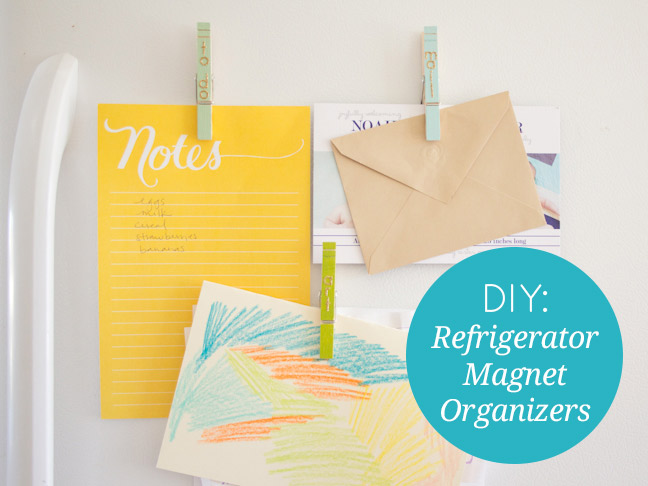
Step 3: When the glue on the magnets is dry, turn the clothespins back over to the painted side. Using your alphabet stickers, spell out words on the painted side of the clothespins. Be creative! Make a pin for anything you need organization help with on your refrigerator. A few ideas could be art, mail, to-do, in, out, send, sign, and so on. Or, you could just fill them with fun words or your kiddos’ names!


Step 4: Finally, cover the front side (stickers and paint) of the pins with a layer of Mod Podge to seal everything together. Allow the Mod Podge to dry, put your pins on your refrigerator, and get organized!