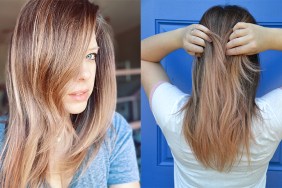
Balayage is all the rage in salons right now. But what the heck is balayage anyway? The short answer, if I’m being completely honest, is that it’s a slight variation on the ever-popular ombre highlights. The longer answer is that in French, balayage means “scanning” or “sweeping.” With the balayage technique, highlights are hand-painted on (as opposed to highlights being added by painting chunks in foil, or pulling strands through a cap and highlighting them). The longer your hair, the more dramatic the effect, however balayage works on all hair lengths, from short to long.
What makes balayage especially great for moms is that the highlights are painted on most heavily toward the bottom of your hair, and sparsely to not-at-all near your scalp, so when your hair grows out, it’s not so obvious. If you don’t have grays and you retain your natural hair color, you can let your hair grow out for months and your balayage will still look relatively fresh. It’s probably one of the most low-maintenance color services you can get.
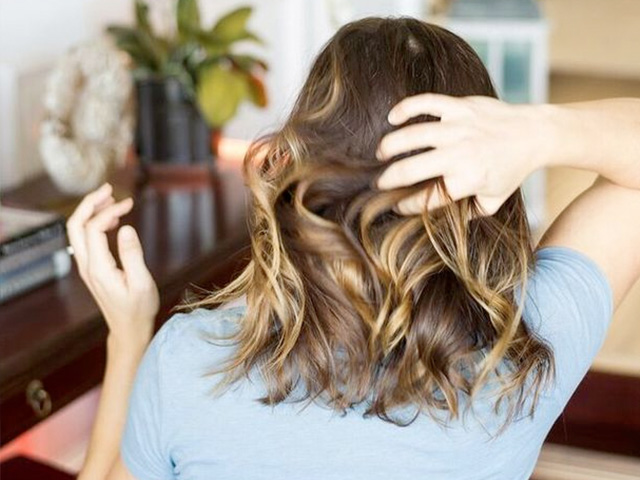
If you’ve had your hair colored with the balayage technique, you’re probably quickly learning that hair looks best wavy, to really make your color pop. Here’s a quick tutorial on how to style balayage highlights the right way, to create really nice movement and accentuate the color.
RELATED: 7 Hottest Hairstyles for 2016 (& 5 Hair Trends That Died with 2015)
Supplies:
- Large alligator hair clips
- Curling Iron or Curling Wand from Hot Tools, with 1½-inch barrel, $30.95
- Dry Shampoo — I love Oribe Texturizing Spray, $39
- Hair Wax
Instructions:
Step 1: On fresh or day-old hair, separate the hair into two sections with clips.

Step 2: Using a one to one-and-a-half inch curling iron, taking about two inch sections, wrap hair around the iron and wait about five seconds before releasing curl. Make sure to leave the ends out to create a more relaxed look.

Step 3: Repeat step two all around your head to complete the bottom layer. Make sure to always curl away from the face.

Step 4: Section the top portion of your hair into two workable sections. Repeat wrapping hair around the iron for loose curls. Again, make sure to curl away from the face.

Step 5: Wrap hair to curl and continue around all of top portion.

Step 6: Muss up the curls with your fingers. You can also add a bit of dry shampoo at this point if needed or desired.

Step 7: Apply a small dose of hair wax to fingertips.

Step 8: Apply the wax to ends of hair to smooth any breakage.

Voila! You have pretty and soft curls that show off your gorgeous highlights.

More Hair Tutorials: