
If you’re looking to add some personal or unique touches in your kid’s room or baby’s nursery, curtains are a great way to do it. When I was designing my oldest son’s nursery I found some fabric I loved, but I had no idea how to sew (and still don’t!). So I figured out a way to make some cute window panels with my fun fabric that did not include sewing. And they are way easier than you would think. Seriously, it is so easy a monkey could do it.
Here’s how to make no sew curtains for any room in your house:
Supplies:
- Fabric (This is the fabric I chose; I bought six yards and used a coupon, so I paid around $35.)
- Scissors (I used regular scissors, but fabric scissors would be a bonus.)
- Heat’n Bond Ultra Hold Tape
- An iron (Any iron will do.)
- An ironing board or other flat, hard surface
- Curtain rings (Number depends on the width of the panel, but I used seven for each panel.)
- Curtain rod (and you may need a drill, hammer, etc. to install curtain rod)
Instructions:
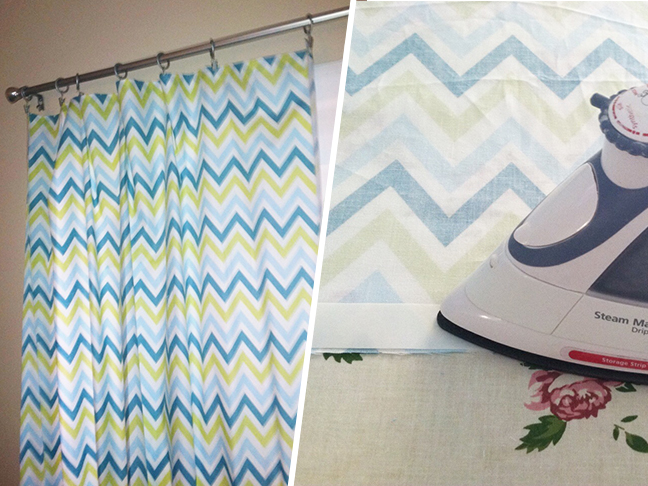
Step 1: Lay your fabric out, one panel at a time, on your ironing board, reverse side up.
Step 2: Next plug in your iron (the bonding tape instructions say medium heat and no steam).
Step 3: Lay the bonding tape out along the edge of the fabric, paper side up.
Step 4: Next, put your hot iron down on the edge of fabric on the tape and run the iron along the edge of fabric/tape. The tape instructions say to keep it on for two seconds, but I did it for a little longer.

Step 5: Run the iron all the way down the fabric until the tape is sticking all along the edge. Then let it cool.
Step 6: Once cooled, peel the paper off and then fold the edge over to make your “hem.” I found it easier to fold it so that the whole piece of tape was folded. Then start ironing the edge in place again, as you did on the paper side of the tape.

Step 7: Iron all the way down the edge, as you did on the paper side of the tape, leaving it on each section for at least six seconds. I did it a bit longer.

Step 8: Once it has cooled, check to make sure the fabric has bonded. If it hasn’t, put the iron on it for a bit longer. If it has, you can add your curtain rings. My panels were forty-four inches wide, and I used seven rings for each panel (most come in packs of seven).
Step 9: If your curtain rod is already installed, then your curtain panels are ready to hang.
You could use these same instructions to hem pretty much anything or to make a table runner, aisle runner for a wedding, or anything else you can think of that is made from a basic piece of fabric. Who said you need to know how to sew to make curtains!?
More No Sew DIY Home Projects: