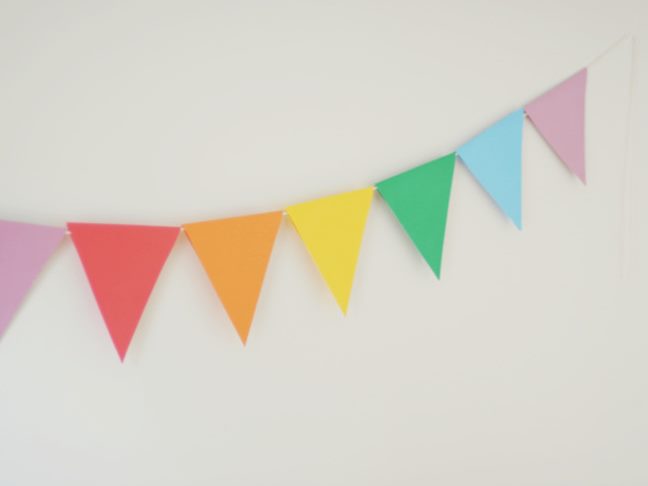
Need some quick festive decor for your party? Try this Paper Party Banner that’s so easy to DIY that even the kids can help! Even if you’re not entertaining, you can use this adorable banner to brighten up the kids’ playroom. Learn how to make it below.
Supplies:
- 6 pieces of 12 inch x 12 inch scrapbooking paper (in whatever colors you desire; I chose a rainbow these)
- pencil
- ruler
- scissors
- glue
- twine

Instructions:
Step 1: Take one piece of your scrapbooking paper and fold it in half. Making sure the fold is at the top, using a pencil, draw a line down the middle of the folded piece of paper at the six inch mark, and then make notches along the bottom of the paper at both the three inch mark and the nine inch mark (see white indicators on photo below Step 2). Repeat this process for all 6 pieces of paper. Doing this ensures that each flag will be the same width, and will help you cut even triangles.
Step 2: Now you’re ready to draw the flags. Using your ruler as a straight edge, simply draw a line connecting the top corners of the flag to the three inch mark, and repeat for the flag on the opposite side. (See red lines on photo.)

Step 3: Cut out all 12 flags from the paper along the lines you’ve drawn.

Step 4: On a space with a long surface area (like a dining room table, counter, or the floor), unwind a long piece of sturdy twine and start placing the flags onto the twine, one right after the other. The twine should tuck inside the flags’ top folds. Make sure there’s enough twine left on either end to hang the garland.
Step 5: Apply glue to the inside of each flag and press shut. Let the flags dry on a flat surface before hanging.

Step 6: Use tacks or nails to hang your banner to the wall, over a doorway, on a mantle, over a headboard, around a table … wherever you want to add a bit of whimsy and fun!