Ah, family vacations. The packing, the sleeping arrangements, the… flight! When my husband and I started a family, we were adamant that having children was not going to hinder us from one of our favorite things — travel — and we’ve been pretty good about keeping that promise to ourselves. Our daughter’s first flight was when she was about ten-weeks-old and she’s come along on countless trips with us (or just me!) ever since. But as she’s gotten older, it’s become increasingly difficult to keep her content on a plane. At two-and-a-half, I’m finding snacks are the ultimate saving grace of airline travel with children.
But let’s face it: airport food is gross and expensive. Quick grabs from the airport kiosk like chips and fruit snacks are only going to make my toddler hyper, then grumpy. Plus, they’ve got a heavy impact on the wallet. It takes a little prep time and thought, but making healthy travel snacks at home and bringing them on board is now my favorite. Especially since we’ve got some food allergies in the family, this takes the guesswork out of airplane snacks, while saving us money and stress at the gate. Here are my favorites:

1. Rainbow Fruit Skewers
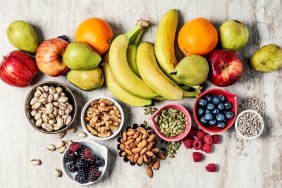
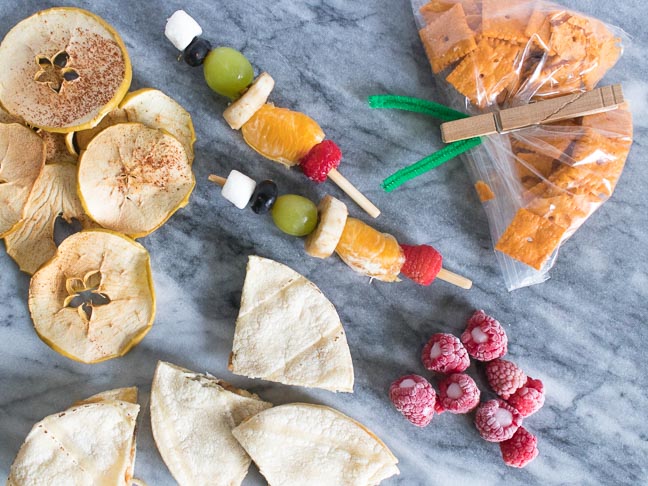
Full-on fruit salad is usually a disaster; they’re digging around in there with their forks, spilling juice all over the place, and then you’ve got a plastic container to dispose of or stash. These quick and easy skewers are fun to look at, taste great, and take next to no effort. All you need is a “rainbow” of fruit — my go-to’s being strawberries, oranges, banana or pineapple, kiwi or green grapes, and blueberries — and skewer sticks. Arrange each one in ROYGBV order and store in plastic bags for the plane. Going for Supermom status? Put marshmallow “clouds” at the ends of the rainbow for a treat.

2. Peanut Butter & Banana Quesadillas
Anything in a tortilla is more exciting than it would be on normal bread — plus, these are slimmer and easier to slice into tiny pieces ideal for little hands. Warm corn tortillas slightly in a toaster oven to make them slightly crisp. Then, spread peanut butter or the nut butter of your choice on each one. Add thinly sliced bananas, place two together into a sandwich, and cut in half or quarters. Make an extra one for yourself, because you’re going to want it!

3. Butterfly Treats
These are pretty open-ended as you can fill them with anything you want. But it’s the presentation that makes them so fun! You’ll need plastic snack bags, pipe cleaners, and clothespins. Simply fill slightly less than half of the bag with one snack (small crackers, pretzels, sliced grapes), move it all to one side, and fill the remaining portion with either the same or a separate snack to mix things up. Seal the bag, folding the top down so that the closure doesn’t show from the front. Affix a clothespin to create the body of the butterfly. Run your pipe cleaner through the top of the clothespin to create antennae. Your “snacker-flies,” as we call them, are ready to take flight.

4. Yogurt-Filled Raspberries
I got the idea from a Pinterest mommy who went so far as to use a piping bag to get the yogurt in hers. Well, this mom is all about shortcuts, so I just use yogurt pouches that we already have to do the work! Wash your raspberries and pat them dry with a paper towel. One at a time, insert the tip of your kids’ favorite squeezable yogurt, filling almost to the brim. When we eat these at home, we pop ’em in our mouths right away. For travel, I freeze them overnight and pack them in plastic baggies next to an ice pack so they stay solid and cool for the plane.

5. Baked Apple Chips
Anything crunchy will do when it comes to my family — we can’t get enough. And while you can totally buy apple chips, they tend to be pretty pricy for how cheaply and easily you can make these at home. Wash your apples and slice them fairly thin. If you have a mandolin, use it. I do just fine with a big old knife, though.
Spread apple slices on a greased or lined baking tray and sprinkle liberally with cinnamon. Flip the apples over and repeat on the other side. Bake low and slow — up to three hours on 250 degrees. (Check them around the two-and-a-half-hour mark though). Let them come to down to temperature slowly — either on top of the stove or right inside with it turned off, for at least an hour. Bag ’em up and hit the road! (Or should I say the runway?)
Photos: Holly Wade of Club Crafted