
We are Disney FANATICS in our household. I visited Disneyland often as a child, and I always vowed to take my kids to Disneyland, too. Although we haven’t made it just yet (our daughter is only 3), I’ve whipped up some DIY Disney tees to get us all excited for our trip to the Magic Kingdom. We hope to go in the next year. And here’s the thing: All of the ideas here are super easy to make; the most complicated design can be finished in under 90 minutes. So go ahead: Embrace your inner Disney-loving child. And share the Disney love with your family, too.
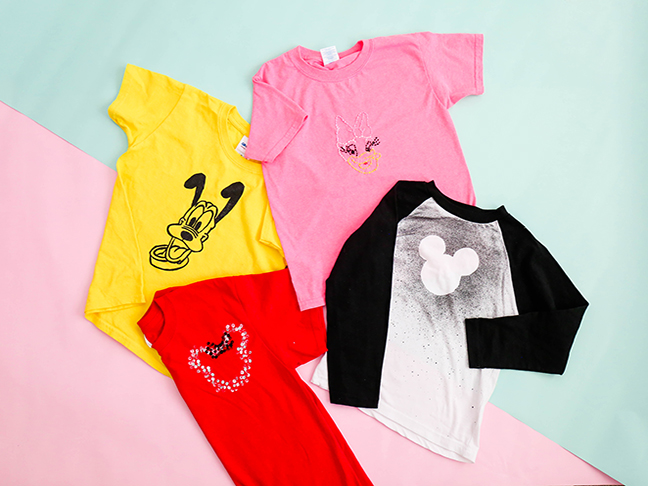
We’re all in love with our tees so much we’ve been wearing them over and over…hopefully you’ll feel the same way. Here’s how to make four different DIY Disney tees, with designs for Pluto, Daisy Duck, Minnie Mouse, and Mickey Mouse. Have fun!
Pluto T-Shirt

First up, this fun screen-printed Pluto! You’re probably familiar with the many uses of freezer paper – including making your own tee-shirt designs!
Materials needed:
- Picture of Pluto (we used this one!)
- freezer paper
- marker
- X-acto knife
- iron
- black acrylic paint and foam brush

First, print out your design at the size you would prefer. We printed on a regular letter-sized paper as this was going on a children’s shirt. Place the design under the sheet of wax paper and trace over it with the marker.

Next, and this is important, pay attention to the negative space that you will cut out so you know what will actually be paint, and what will be shirt. I wanted the shirt to exactly match the design so where there is black on the design, that is what I will paint. I carved around all of the black pieces of my design and set them aside. Start on your smallest pieces first as they’re the most tricky to cut out.

Once your design is cut, create a mockup of how it will look on your shirt so you can be sure you know exactly where you’ll be painting. Bonus: use the opposite design to create another tee-shirt!
Now place the stencil on your shirt! Use a tee-shirt form, a piece of cardboard, or an old towel and stuff it inside the shirt to prevent the paint from leaking through to the back.

Once you’ve got the stencil in place, run over it with an iron for 20 seconds to seal the paper to the shirt. Once your stencil is attached, go over the design with a thin coat of paint!

Because I used black paint, I only needed one coat for this to look super dark. Wait about 45 minutes and then gently peel the paper away. And hooray! A cute shirt sporting Pluto’s face!

Our daughter LOVED this one!