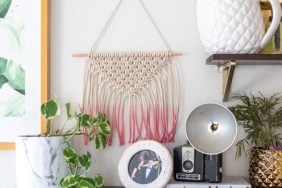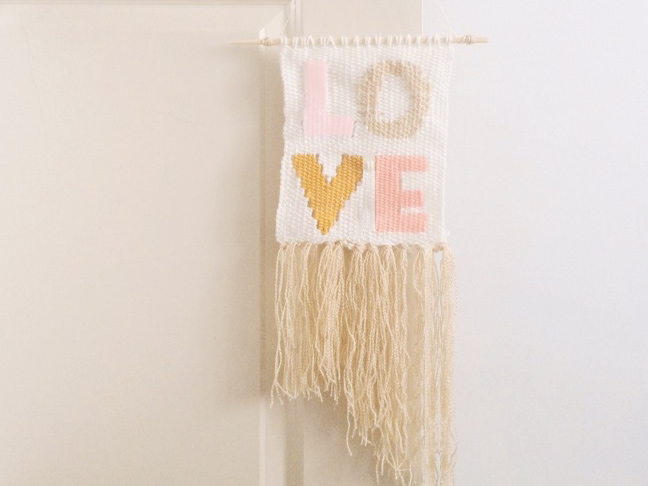

I’ve seen so many colorful DIY wall-hanging tutorials in my Pinterest feed that I just had to add making my own to my winter to-do list. I loved the striped, geometric, and multi-media ones I’ve seen around the web, but I thought it might be fun to add a twist to my first weaving to decorate kiddo’s room. I’m a fan of fab fonts, so I used one of my faves to spell “LOVE.”

My girl was really thrilled with this new addition to her bedroom, and it looks great hovering over her pale pink dresser. Up next? A navy, gold, and pink one for my other girl’s room. Keep reading to get my DIY woven wall hanging tutorial.
Supplies
- loom or white foam core board, pencil, and ruler
- my LOVE template
- yarn: white, pink, salmon, mustard, and metallic gold (or any five colors you choose)
- tapestry needle
- scissors
- transparent tape
- small dowel rod
Instructions:
Step 1: Use a store-bought loom or one that you make. If you create a loom, cut a piece of white foam core board to your desired size. My loom is 8.5″ wide x 10.5″ high. Measure and mark every ¼” across the top and bottom of the foam core. Using heavy duty scissors, cut along each mark. These will form the pegs to support your warp.
Step 2: Cut a length of yarn long enough to wrap vertically around your loom 10-12 times. Tie a loop at one end of your white yarn and place it around the first peg of your foam core. Bring the strand of yarn down the front of the board, and pull it through the first ¼” cut at the bottom of the board. Wrap it behind the first peg, and pull it through the second ¼” slit to bring the strand back to the front side of the board. Continue this process until you’ve strung the entire loom. The white yarn has formed your warp, or the structure for your weaving. Tie another loop at the end of your yarn to secure it around the last peg. The warp should be secure but not too tight.
Step 3: Print my LOVE template onto a sheet of 8.5″ x 11″ paper. Slide it onto the foam core underneath the warp, and tape it into place.
Step 4: Thread the needle with your first yarn, and begin weaving onto top of the “L” in an over/under pattern. Complete one row of the letter, and then create a second row underneath by continuing the over/under method. Extend the rows to conform to the shape of the “L.” Finish the letter by leaving the end of the yarn behind the warp. Tape the end to the foam core to keep it taut while you move on to the next letter. Repeat for each letter.
Step 5: Once each letter is complete, return to the top of the loom to begin weaving your background color. Continue in an over/under pattern around each letter. Frequently check the outer edges of your weaving to ensure that you aren’t pulling too tightly and causing the wall hanging to cinch in unevenly. To weave inside of the “O,” weave up to the edge of the letter, pass the white yarn behind the “O’s” colored yarn without going over or under, and then pull the white yarn back up through the center of the “O” to resume the over/under weaving. Be sure to continue the pattern over or under depending on the pattern in the row above. Complete the last row, and tape it to the foam core.
Step 6: To create tassels, cut 4-6 strands of yarn and fold into a “U” shape. Slide the bottom of the “U” under three warp strands, and bring it out far enough to pull the other ends of the “U” through the loop. Pull tight, and let the yarn hang. Repeat across the bottom of the weaving, and cut the tassels to the desired length.
Step 7: Gently remove the bottom warp strands from the pegs of the loom. Remove the tape from the strands and foam core, and then tie the loose strands together to keep them secure.
Step 8: Remove the top loops one at a time, and wrap each one twice around the dowel rod before removing the next.
Step 9: Cut a length of gold yarn, and tie a small loop around the end of the dowel. Wrap the yarn around the dowel several times, and repeat on the other end of the dowel to create a hanging string.
Pics by Shauna Younge of Sweet Tooth
More DIY Wall Art: