Materials:
- 1 sheet black construction paper, 18 x 12 inch
- 1 small scrap of yellow construction paper
- 1 sheet white (or off-white) construction paper, 18 x 12 inch
- paper plate
- black paint
- paint brush
- glue
- Pilgrim Hat Pattern, printed out
- 2 paper clips
- scissors
Instructions:
Step 1: Cut out the inner circle of the paper plate. Use the line on the inner circle of the paper plate as your guide.

Step 2: Paint the outside ring of the paper plate black on both sides to make the hat’s brim. If your paint doesn’t cover well, you may need to add a second coat.

Step 3: While the paint is drying, cut the piece of black construction paper in half long ways, so you have 2 long narrow strips. You’ll use one half for the upper part of the hat, and the other half to cut the circle for the top of the hat, and to cut some small strips to connect the upper part of the hat to the brim.
.jpg "PIlgrim Hat Craft - Step 3")
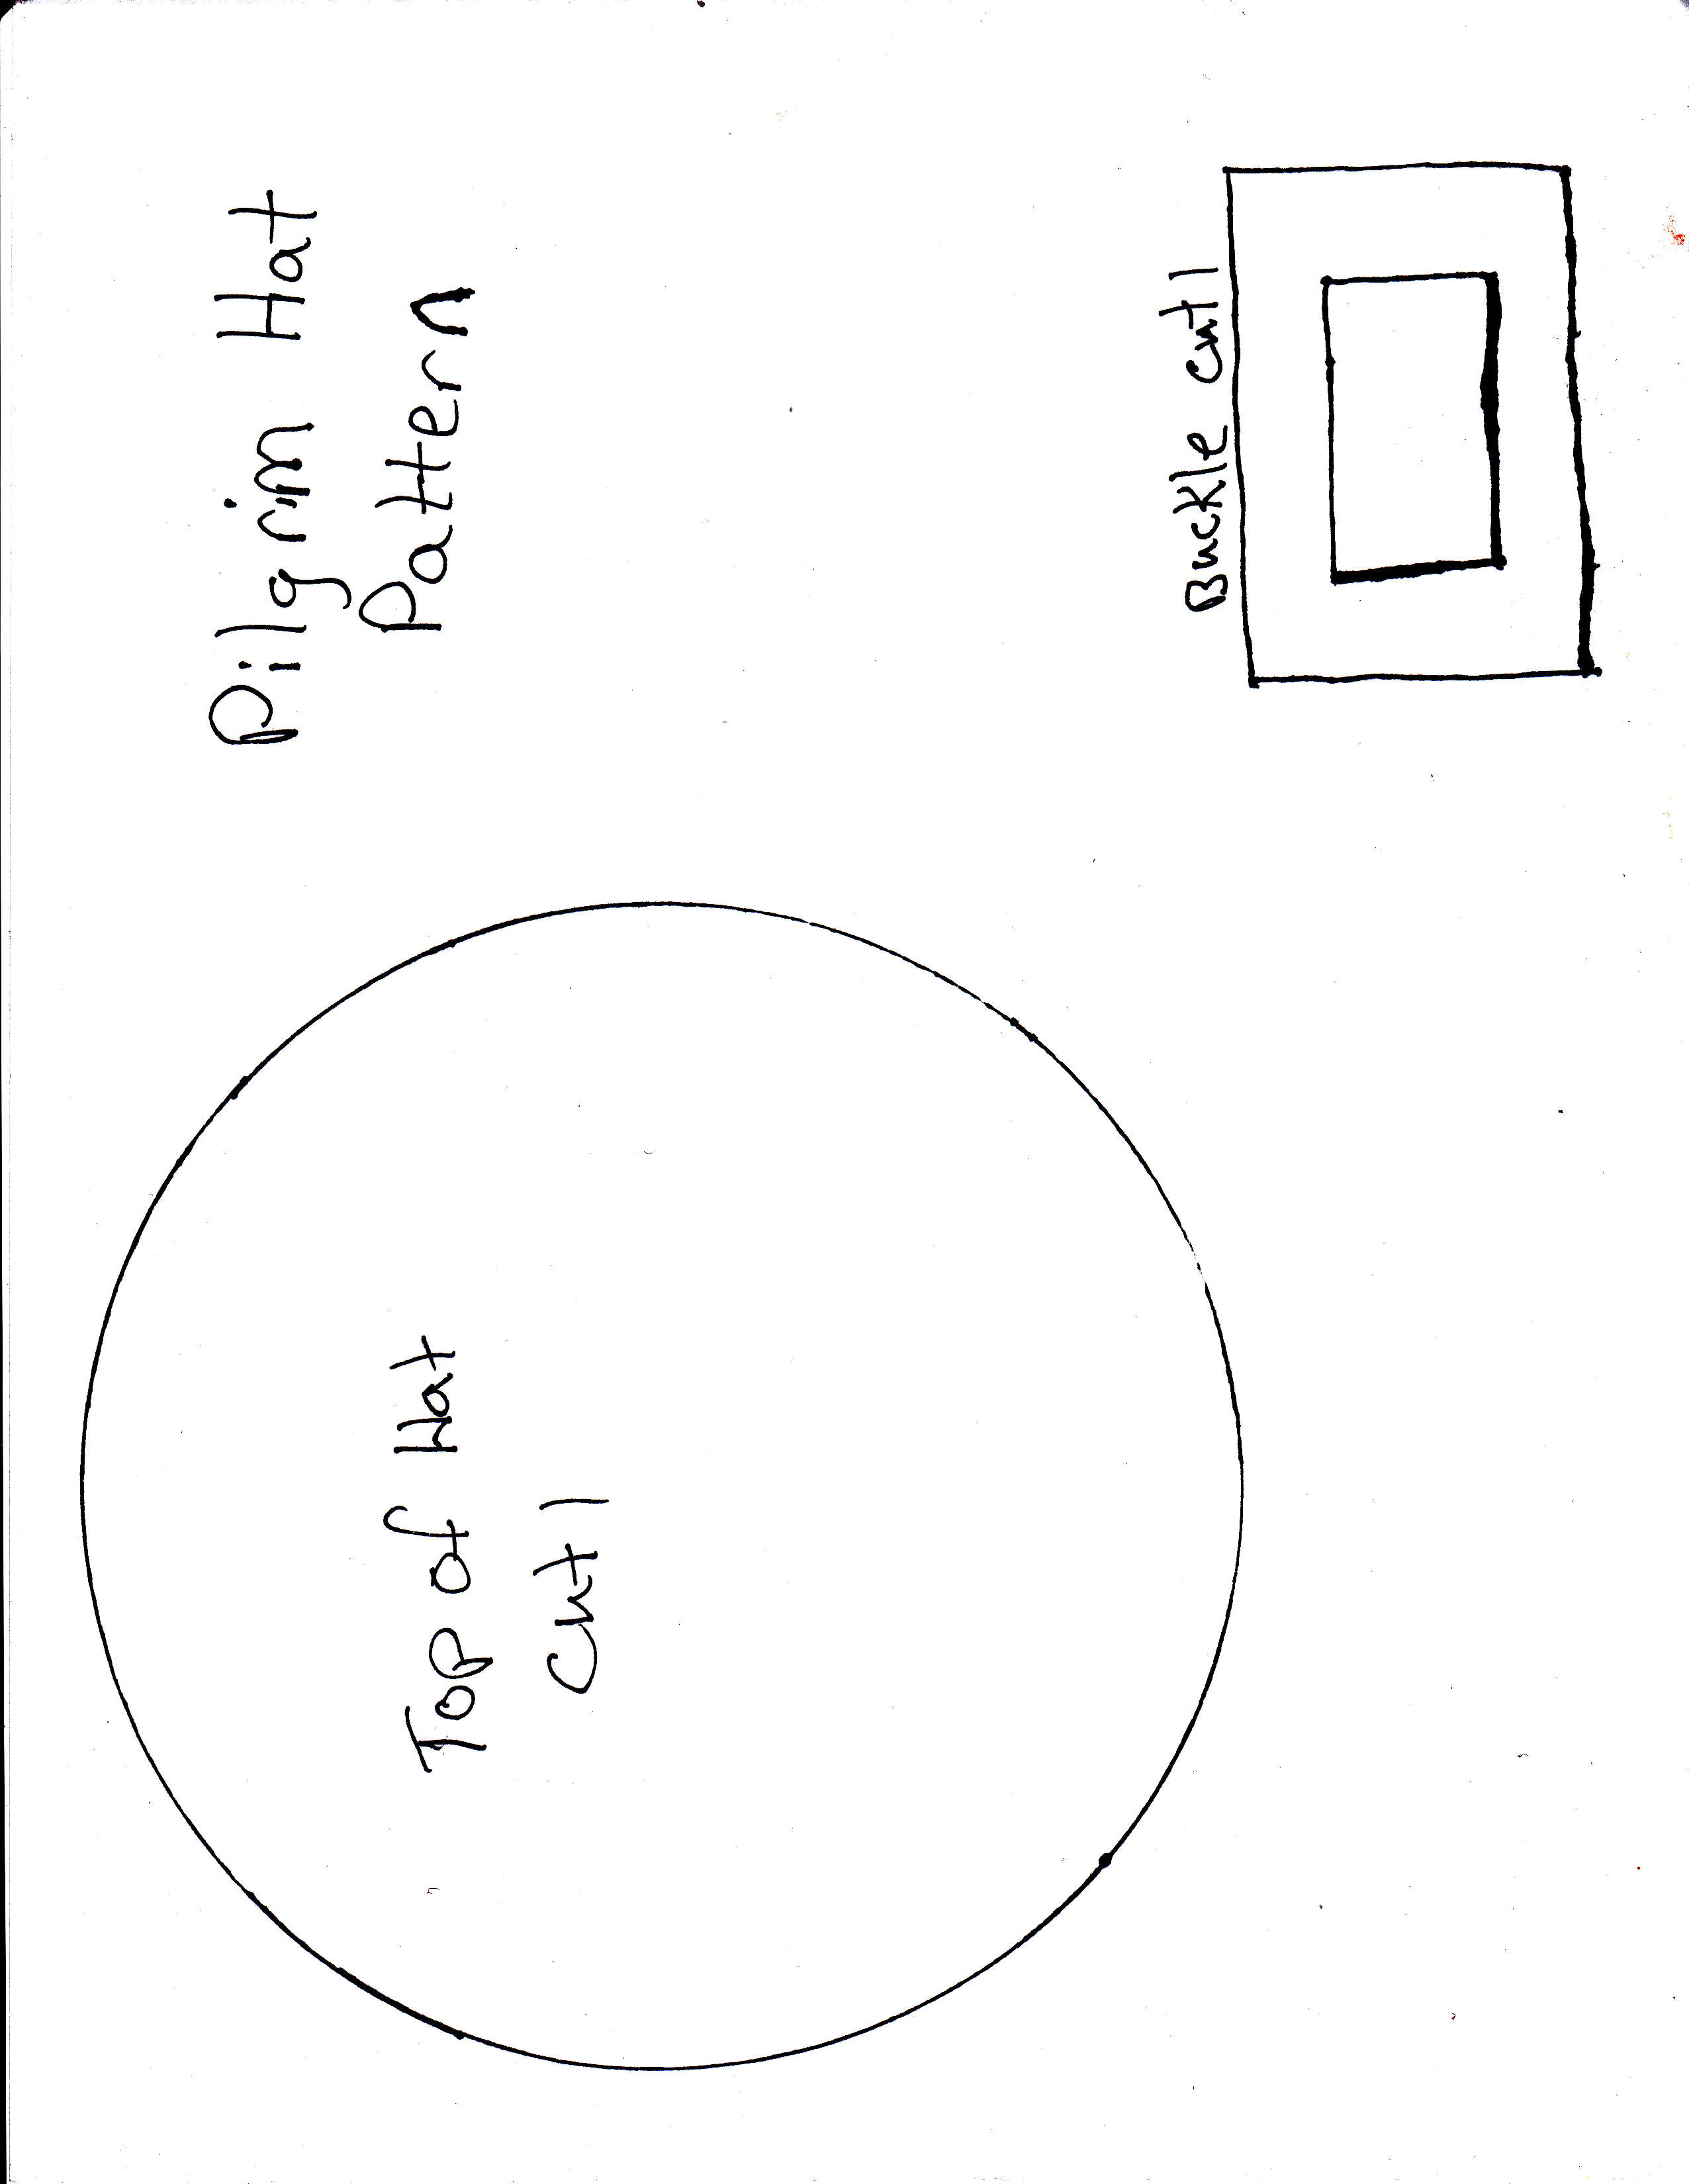
Step 4: Print out the Pilgrim Hat Pattern, and cut it out.
Step 5: Trace the circle onto one of the black construction paper strips. Cut out the circle and set it aside. This will be the top of the pilgrim’s hat.
Step 6: Cut the buckle out of yellow construction paper, and another small yellow rectangle for the center of the buckle. Set them aside.
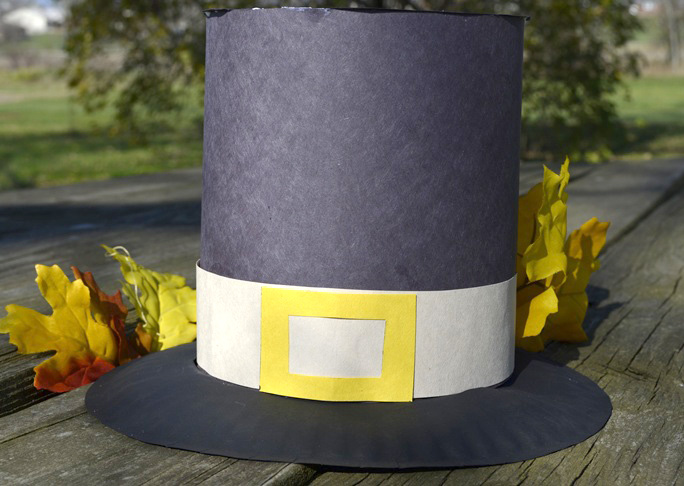
Step 7: Cut a strip about 1 ½ x 18 inches from the white or off white construction paper for the hat’s band.
Step 8: Once the paint has dried, wrap the other strip of black construction paper, and glue it at the seam where it comes together to make the back seam of the hat, with about 1/2 inch overlap. Use paper clips to hold the pieces together until the glue dries.

Step 9: Cut out 4 – 5 strips about ½ x 1 ½ inches. Use the strips to glue the top of the hat to the paper plate brim. Fold them in half, and put glue on each half. On the inside of the hat, stick one half of the paper tabs on the brim, and one half to the upper part of the hat. This will hold the hat together when the glue dries.

Step 10: Glue the white band around the hat just above the brim. Make sure the seam is in the back of the hat.

Step 11: Glue the buckle to the front of the band.

Step 12: Put a little glue around the top edge of the hat, and set the black circle on top.
Step 13: Display your hat with your Thanksgiving decorations, or wear it on Thanksgiving Day.


