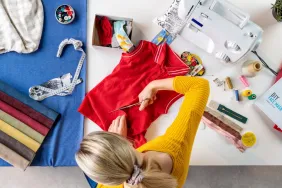
A DIY flannel scarf is easy to make and will get loads of use during the cold weather. With the winter chill not showing signs of leaving anytime soon, now is the perfect time to take up this DIY project and whip up some cozy flannel scarves for your kiddos. Also, add a secret pocket, and your little one might never take it off!
This is a great scarf for those rough-around-the-edges types of boys and girls. Let’s be real, it is perfect for all the kids out there. Moreover, you can add a sturdy opening for the scarf to be pulled through to aid in keeping it around your little one’s neck. It also can have a built-in pocket to tuck away all the goodies they have collected throughout that day. This scarf can be made in about an hour and your munchkins can wear it all season round.
Materials
- ½ yard flannel
- ½ yard fleece
- Coordinating thread
- 2” piece of sew-in velcro
Procedure
- First, cut your material to the following measurements:
- Flannel: 1 piece at 45” x 9”, 1 piece at 7” x 12”, and 2 pieces of 7” x 7”
- Fleece: 1 piece at 45” x 9”
- Take your 7” x 12” piece of flannel and fold it in half so it is 7” x 6”.
- Take a round edge, and use it to create a curved edge for the pocket top. You can use a sharpie to draw the curve.
- Cut out the curve.
- With the right sides of the fabric together, sew the two pieces together with a ½” seam. Make sure to leave a 3” opening unsewn so we can turn the pocket right side out later. Clip corners and curves.
- Turn the pocket right side out and edge stitch around the entire pocket top. This will close the opening you left earlier.
- Repeat steps 5-6 with the pocket body (the two 7” squares).
- Take one piece of the 2” velcro and place it on the inside of the pocket top. Sew it in centered about 1 ½” down from the top.
- Take the other piece of the 2” velcro and place it on the outside of the pocket body. Sew it in centered about 1 ½“ down from the top.
- Take the pocket top and lay it on the right side of your fleece scarf piece about 6” up from the bottom of the scarf. The bottom of the pocket top should be at the 6” mark. Pin in place.
- Make a mark with a pin 2” up from the bottom of the pocket top. This is also the only place you are going to stitch. Stitch the pocket top in place at this one point only.
- Take your pocket body and pin it down, making sure the top of the pocket body is just touching the line you just stitched for the pocket top.
- Pin it in place, and using your previous edge stitch as a guide, stitch the pocket down on the three sides only.
- Take the two scarf pieces, lay them with the wrong sides together, and pin them.
- Sew with a 1/4“ seam around the entire scarf.
- Measure from the pocket side of the scarf, up to 15”. Mark the measurement with a pin.
- Now, to make the slit, cut in 2” at that 15” mark.
- Using a small zig-zag stitch, stitch around the entire opening, making sure you are stitching through both sides of the fabric.
Wrap it around your kid’s neck and pull it through! Also, do let us know in the comment section below if your little one’s enjoyed this easy DIY flannel scarf.


